DIY "Cast Party" Project
- bfisher
- Nov 19, 2018
- 5 min read
Molding and casting the handles of a can opener for mass production
Individual Project, 3 weeks
Key Skills
Part Mold Creation
Resin Casting
Sanding
Experimentation and Iteration
This is the third project in my DIY Design & Fabrication class at Carnegie Mellon University. The task was to take the redesigned can opener handles from the "Get a Grip" project and reproduce them in a more production-like material. Previously, the design had been shaped with Chavant modeling clay; however, this material is too soft for practical, repeated use. The goal was to create a mold for rapid production and use it to produce a more polished result.
I started by identifying the splitline on the clay model to be used when creating the mold. This is important because molds are typically made in at least two pieces so that when the mold material is poured, it does not leave any negative space. Normally, it is also advisable to avoid 90-degree angles when creating the mold parts because it will make removing the mold difficult. However, the surrounding clay was soft enough that by wrapping the part in Saran wrap and spraying the surfaces with Mold Release, this was not an issue for these particular parts.

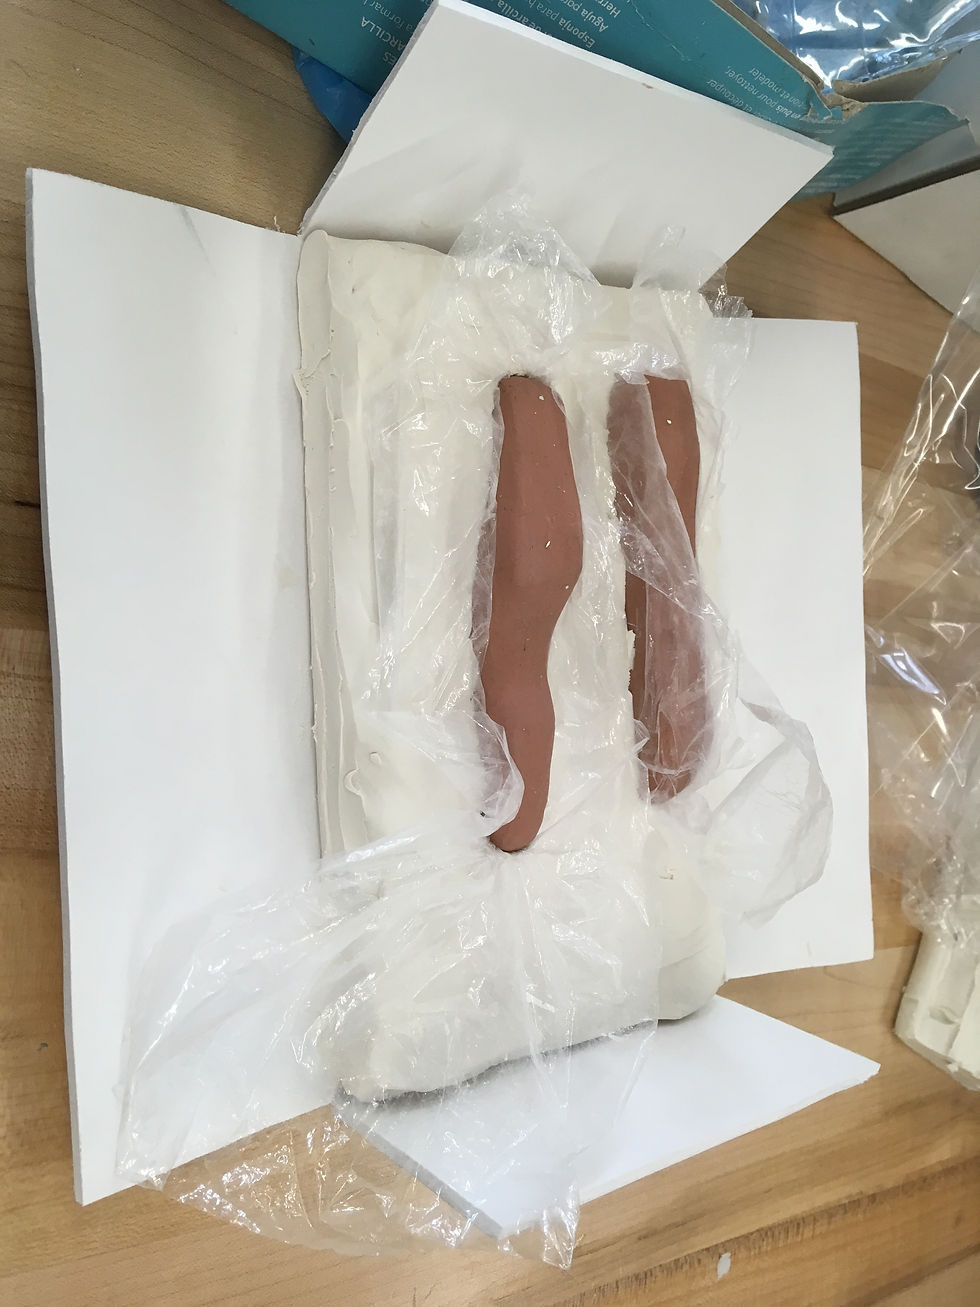
Surrounding the Chavant clay with softer clay up to the splitline
Due to the small size of each handle, a single mold was sufficient to house both parts. First, an overall box was cut out to size the mold, to be folded once everything else was in place. Next, the pieces were set in the desired orientations and surrounded by a softer white clay from the base of the box up to the splitline. This clay was used to take up space so that when the mold material is poured, it will only create half of the overall mold. Prior to pouring the mold, registration keys, or indentations, were added to create negative space for the mold to fill. This is so that when the mold is complete, the two halves will fit together without sliding. I added many of these indentations so that if some of them fell apart during the subsequent steps, there would be enough to keep the halves together when pouring the casting material. The plastic wrap was cut as close to the clay model as possible so as to avoid covering the registration keys and to prevent the mold material, Smooth-On Silicone Mold Making Liquid Rubber, from leaving space between the two halves once the clay model and plastic wrap were removed. This process is shown in the following pictures.
Preparing the first half of the mold
After the mold had cured, the box was torn down and the soft, white clay was stripped away. The box was then reused to keep the same planar dimensions of the mold. The remaining negative space was used to create the second half of the mold. I noticed that although I had used an X-acto knife to cut the plastic wrap as close to the sculpted model as possible, it still left some imperfections in the silicone. It seemed that others who had simply used more mold release and struggled to remove the clay from the silicone still had smoother results. Regardless, as long as the cavity retains the correct overall outline, the extra bumps that will be produced from the additional negative space in the mold can be sanded down once the part is removed. The first half of the mold can be seen below.
Revealing the first half of the mold
Prior to pouring the second half of the mold, I attached funnels and straws to the clay. This was to provide me with points of entry for pouring the resin once the second half had cured as well as air bubble and overflow control. In retrospect, I would have preferred to add small mounds of clay to the top of the part rather than implanting the funnels and straws directly into the model to avoid making any incisions into the clay model.
Pouring the second half of the mold
Once the mold had been made, the next step was to pour a mixture of Smooth-Cast parts A and B to create the resin for the parts. I used a resin with a working life of only three minutes, which was short enough that the first set started to cure before I had finished pouring it into the funnels. As a result, the first set of handles was incomplete, as can be seen in the pictures below. I repeated this process to create a set of off-white, black, dark purple, and light purple handles, leaving enough time to put the mold in a pressure chamber to alleviate air bubbles.
I ran into some difficulties getting the results to be satisfactory. First, the imprecision in the mold along the splitline caused flash, or excess material to be produced along with the desired shape. This required extra of sanding and still affected the integrity of the design due to the indentation into the shape that was created as a result. In addition, despite putting the resin in a pressure chamber, air bubbles were still present in each handle. I tried various methods of tapping and shaking the mold to try to ensure an even pour distribution prior to the resin overflowing the mold, but I was ultimately unsuccessful. Some of the smaller air bubbles could be sanded out but the larger ones meant that the part would stand out as defective. The bubbles can be seen clearly in the second-to-last-picture below.
Resin casting and dealing with short resin working life, air bubbles, and flash.
I chose the iterations with the fewest defects to sand down and smooth out. I started with 120-grit sandpaper and worked my way up to 370-grit after I was sure that I had removed the flash. This forced me to remove more of the material around the splitline than I had intended, but I was determined to keep the result similar in size to the original model.
Sanding a set of handles, comparison with clay model
The assortment of colors in the part is due to the dye being insufficiently mixed because of the working life limit of the resin blend. Ideally, the handles would be given a monochromatic coating after the shape had been finalized. The pictures below show additional comparisons with the clay model as well as other resin parts during the sanding process. I sanded one of the brighter purple handles because it had even less flash than the duller purple counterpart.
Iterations of casted parts and sanding down the most promising candidates.
Overall, the quality of the product improved with each iteration, although the starting point and limits of post-processing endeavors were inconsistent. A more precise mold would have led to less sanding and more uniformity among parts. Although I spent much time flattening the clay around the part before pouring the mold mix, the plastic wrap simply created irregularities in the mold anyway. Even so, I enjoyed the experience of taking a previous project and making preparations to make it more suitable for mass production.


Comments